
OFFLINE HOBBIES · A SMALL REPAIR WITH PERSONALITY
Your favorite tote has carried library books, emergency snacks and at least one receipt from a different era. A small hole is an annoying plot twist. It does not automatically mean the bag has finished its story.
This guide to visible mending for beginners walks you through one manageable project: sewing a contrasting fabric patch over a small hole in a plain cotton tote. You will learn how to choose the spot, size the patch and attach it without turning the entire bag into a very shallow pocket.

What makes the mending “visible”?
The repair becomes part of the design: a checked square, a contrasting edge, a little color you chose. The Embroiderers’ Guild of America describes visible mending as an ornamental approach to repair, including work on fabric bags as well as clothing.
Our slow-stitching guide starts with a practice collage and a bookmark. Here the job is more specific: cover damage and attach the patch to sound cloth. The finished repair needs to hold together, even when the stitches have personality.
Repair skills are also getting fresh attention. In a September 29, 2026 update, Levi Strauss & Co. described hands-on repair teaching in schools and community settings, with its Wear Longer Project expanding to Europe in October. That is a concrete example of current interest, not a measure of how often everyone searches for mending.
Choose an easy repair before choosing a cute patch
Empty the tote and look at both sides of the damage in good light. Is the surrounding fabric still firm, or does a much larger area look thin and worn? The patch must reach healthy cloth; sewing into a fragile border gives the new stitches little to hold.
- A good first candidate: A small hole in an otherwise sturdy, unlined cotton bag, with easy access to the back of its front panel.
- Save for another lesson: A torn handle attachment, split seam, damaged bag bottom, lining, stretchy fabric or coated waterproof bag. Those need different repair decisions.
- No damaged tote? Practice by attaching a patch to a spare cotton square. There is no need to create a hole in something that works.
A patch does not establish a new weight rating for a bag. If the handles or base are failing, a decorative repair on the front will not solve that problem. Choose this project for a small, local defect.
Gather a small kit
- The clean, dry tote and a clean, washable cotton scrap of similar thickness and stretch.
- A sharp hand-sewing needle that passes comfortably through the layers, plus all-purpose sewing thread in a color you enjoy.
- Fabric scissors, a ruler or tape measure, and a few pins.
- Tailor’s chalk, a thimble and a secure place for needles. An iron and heat-safe surface help with folded edges; follow the fabric’s care instructions.
Prewash the scrap as you intend to wash the tote. Choose fabric that tolerates the same care, and check an unfamiliar bright scrap for dye transfer before pairing it with a pale bag. Do a few test stitches through offcuts first: the needle should move without a wrestling match.
Skip the large embroidery bundle for now. One usable scrap beats forty colors that require a new storage system. If threading is the main obstacle, a needle threader is a useful small addition.

Size the patch for the worn area, not just the opening
Patagonia and iFixit’s patch-making guide recommends a finished patch extending at least ½ inch beyond the damage on every side, with extra fabric for turned-under edges. Increase the overlap if necessary to reach sound cloth.
Lay the bag flat without stretching it. Measure the widest and tallest parts of the whole weak area, including thinning fabric around the opening. Mark a rectangle around that area with chalk. Measure your overlap outward from this rectangle, not from the most obvious hole.
Here is an intentionally generous example for a small area of damage no larger than 1 × 1 inch. These are example dimensions, not a universal size for every hole:
| What you measure | Example size | What it does |
|---|---|---|
| Entire damaged area | 1 × 1 inch About 2.5 × 2.5 cm | Includes the thin cloth around the hole. |
| Finished patch | 3 × 3 inches About 7.6 × 7.6 cm | Leaves 1 inch of overlap on each side. |
| Fabric to cut | 4 × 4 inches About 10.2 × 10.2 cm | Allows ½ inch to fold under along every edge. |
Look closely for the tiny horizontal and vertical threads in both fabrics. Align those directions when positioning the patch; avoid turning the scrap diagonally just to fit. Fold the margins toward the patch’s back and press flat. Tuck the corners neatly; if the layers are bulky, use the linked guide’s photographed corner-folding instructions.
Three color ideas that still feel like you
Quiet contrast
Rose on plum, with thread close to the rose. A gentle shift in color can be enough.
A little picnic energy
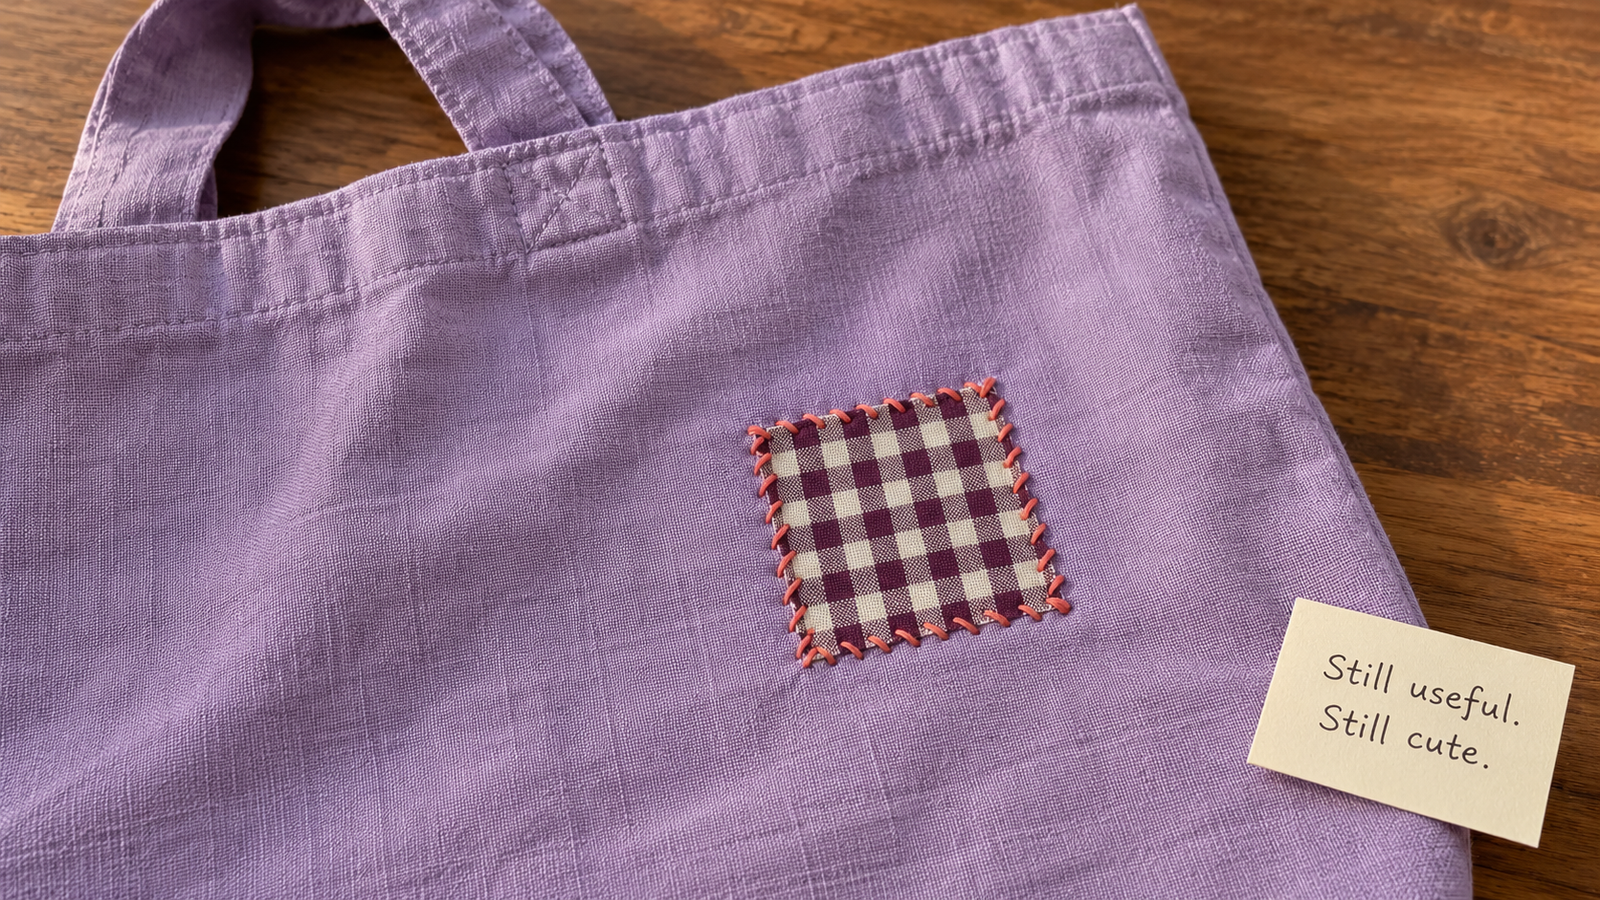
Small gingham on lilac or green. Let the check pattern do the decorating.
One tiny floral
A small-print cotton patch on a plain bag. Keep the shape simple so the print stays readable.
Lay two options over the spot before cutting either. Look at the whole bag, not just the patch. You might prefer the quieter scrap once it is next to the handles and seams. These are design suggestions, not materials you need to buy.

Sew the patch without sewing the tote shut
Open the bag and isolate the panel you are repairing. Pin the patch over the damage, catching only that panel. Check inside before the first stitch. A book bag that cannot accept a book is a fairly specific design flaw.
The following is a short working summary of the Patagonia/iFixit whip-stitch patch tutorial. Keep its real close-up photographs handy for the needle path. For a slit with edges that meet, its linked tear-repair lesson also shows how to secure the tear before covering it.
- Thread and start.Cut about 24 inches of sewing thread, thread the needle, and knot the two ends together. Bring the needle from behind the patch to its face near a folded edge, hiding the knot underneath.
- Cross the edge.Take the needle down through the tote just outside the patch. Come up through the tote and patch roughly ¼ inch farther along the edge and ¼ inch inside it. Each new stitch advances along the border rather than repeatedly entering the same hole. Repeat around the perimeter, forming small diagonal loops.
- Keep the cloth flat.After every few stitches, lay the panel flat and smooth it with your fingertips. The thread should sit against the cloth without gathering it. Remove pins as you approach them. At each corner, turn the bag and continue along the next folded edge, checking that the folded layers remain tucked in. Keep the other panel clear. Left-handed stitchers can work in the direction that feels comfortable.
- Finish securely.Leave a few inches of thread. On the back, slip the needle beneath a nearby stitch, pass it through the resulting loop, and tighten gently; repeat. Trim, leaving a short tail. Secure a new thread the same way if needed.
The “is it actually finished?” check
Remove and count every pin. Run a fingertip around the patch: an edge should not lift into a loose flap. Look inside to confirm the back panel is free, check the knot, and remove loose thread ends. Open the tote fully before putting anything in it.
Inspect the original hole from inside too. If fabric is missing, do not pull the hole closed and distort the bag. A heavily fraying opening needs its raw edge secured to the backing patch as a separate repair step; ask a mending instructor to demonstrate that on your fabric before using the bag. For your first project, choose a small stable opening rather than a large unraveling area.
When the repair is being a little dramatic
- The bag puckers: Undo the tight section and stitch again with less pull. The goal is a flat patch, not a miniature drawstring pouch.
- The needle is difficult to push: Recheck your needle and layer thickness. Use a thimble, and stop rather than forcing a bent needle through a thick corner.
- The patch shifts: Repin it with the bag flat. For extra control, sew a loose line of long temporary running stitches through the patch and front panel only: bring the needle up and down along each edge, leaving a tail rather than a tight knot. Keep this basting line away from your final edge stitches. Remove it after the permanent border is secure.
- You caught the back panel: Undo those stitches carefully, open the bag and restart. It is worth checking every few stitches.
- The patch is too small: Recut it to reach sturdy cloth. Adding more stitches to weak fabric does not make the margin wider.
Give the repair a useful next chapter
Follow the care instructions suitable for both fabrics. Check the patch after its first wash and occasionally during use; add or redo stitches if an edge begins to loosen. Keep one small leftover scrap with the thread so the next touch-up is easy to match.
Your tote could become the home for a paperback, sketchbook or the supplies from our analog bag guide. If sewing turns out not to be your favorite activity, you still learned enough to describe a repair to someone who enjoys it.
Want company next time? Look for a beginner mending session at a library or community arts center. Ask whether it teaches hand sewing and whether you can bring your own item. “Open sewing” sometimes means independent project time, so check before arriving with a tote and a hopeful expression.
Keep the thing. Make it a little more yours.
Choose one small repair, give it enough fabric, and check that it holds. Your first patch does not need a perfect border to look intentional. It needs secure stitches and a bag worth another outing.
Still useful. Still cute. A reasonable goal for the tote—and a lovely way to spend part of an afternoon.
Repair demonstrations and further reading
- Patagonia/iFixit: Make a Fabric Patch — fabric matching, sizing and corner folds; updated October 15, 2025.
- Patagonia/iFixit: Whip Stitch on a Patch — real step photographs, thread changes and finishing; updated October 15, 2025.
- EILEEN FISHER: Visible Mending 101—Patching — an alternative running-stitch demonstration by its sample maker and patternmaker; August 28, 2024.
- Embroiderers’ Guild of America: Introduction to Visible Mending — background and examples; February 14, 2020.
- Levi Strauss & Co.: Wear Longer Project update — current repair-education context; September 29, 2026.
Sources checked October 21, 2026. This is a beginner project guide, not a load-bearing repair specification. Keep needles and pins secured between sessions and away from children and pets. Images are AI-generated editorial illustrations, including the photographic-style examples; they do not document a tested repair. Use the linked real demonstrations for sewing technique. The color combinations, tote scenario and suggested session length are LIFVYT editorial ideas.
The Sunday Soft Reset
A calmer start to your week.
Get Lifvyt’s weekly collection of gentle wellness reads, nervous-system resets and practical tools — plus the free 5-Minute Nervous System Reset Guide.
By signing up, you’ll receive the free guide and one gentle Lifvyt email each week. Unsubscribe anytime.