
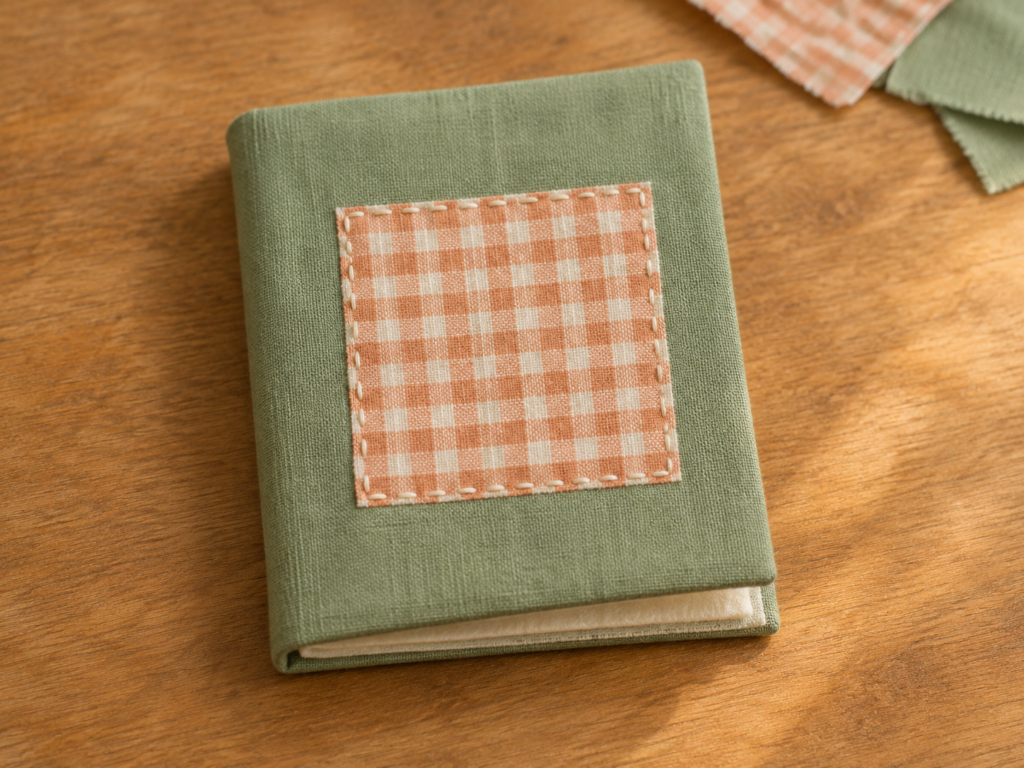
A needle book is a little fabric case that opens like a book. The pages are felt, and the needle tucks into a page between sewing sessions. If your last project left you with a favorite scrap and nowhere sensible to put your needle, here’s a use for both.
For this slow-stitched needle book, you’ll sew a gingham square onto a sage cover, hide the thread ends under a lining, and bind one piece of felt down the middle. The book finishes about 3½ inches wide × 4 inches tall when closed. No machine, batting or clasp needed.
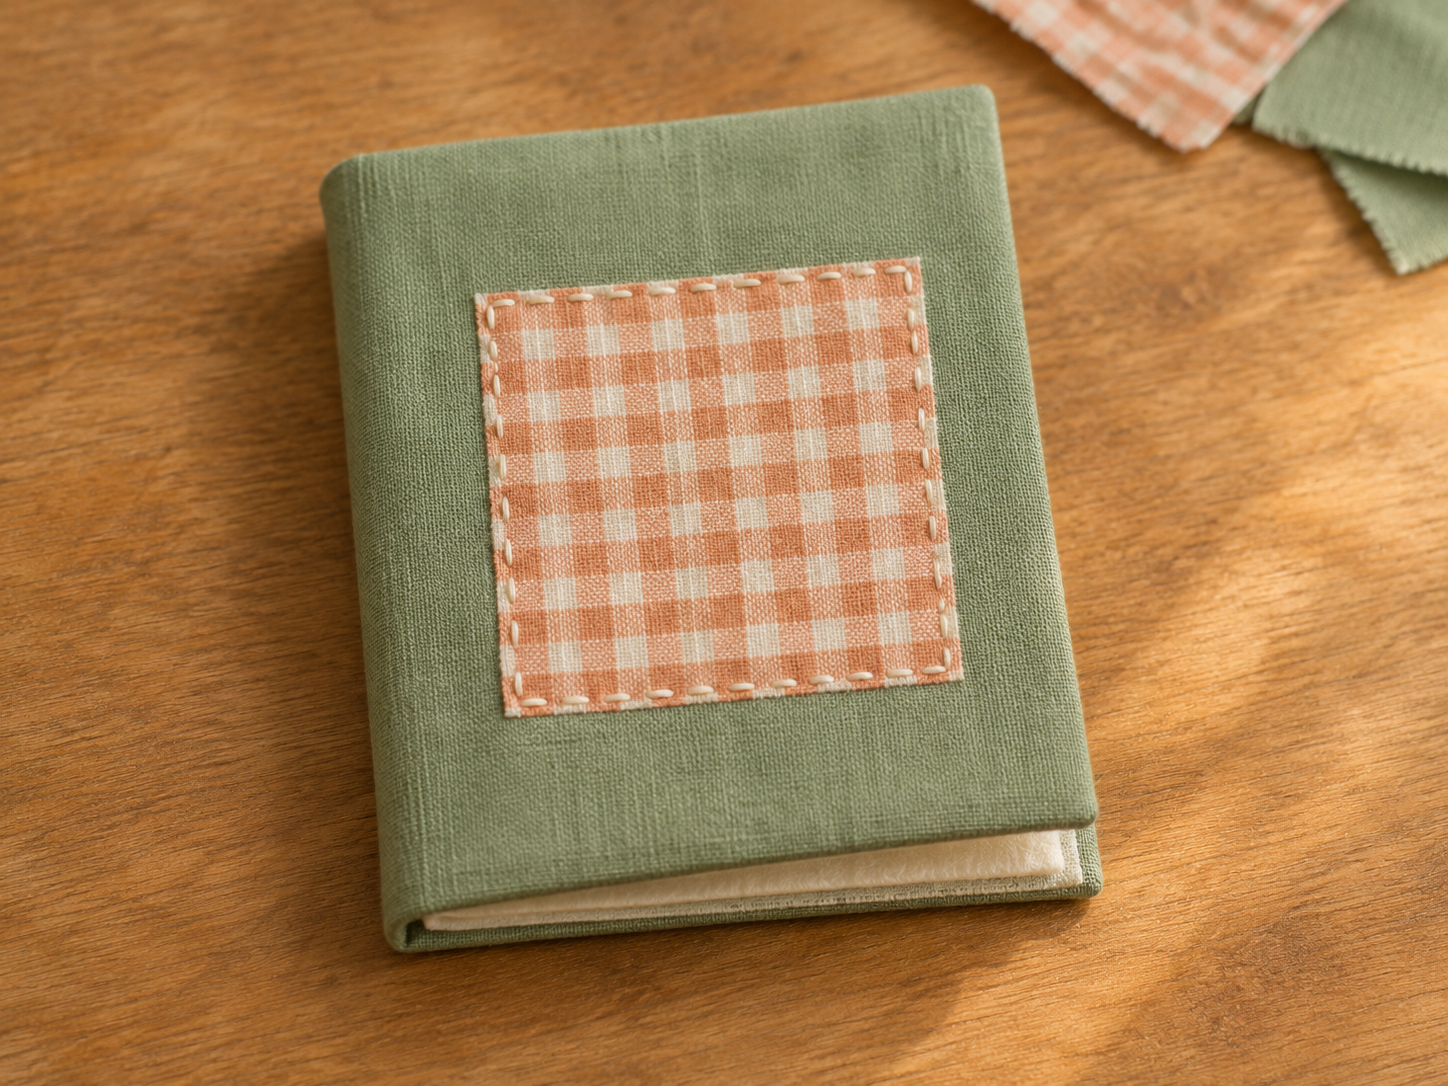
Tap any image to open it at full size. All measurements are also written out below.
What to pull from the scrap basket
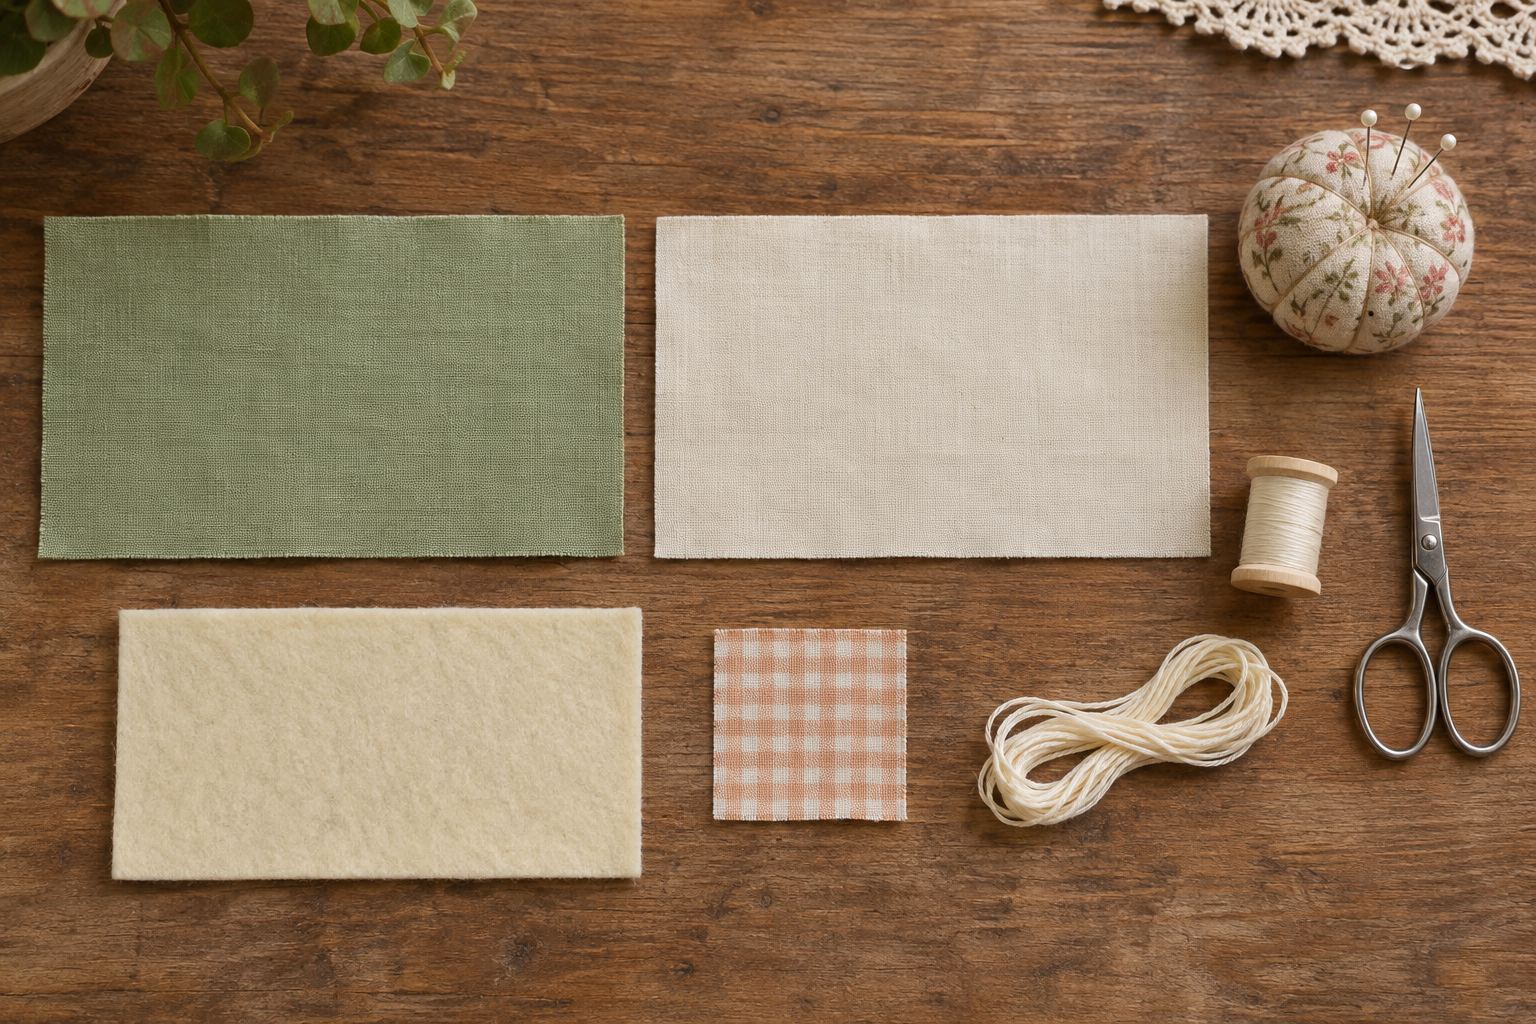
Choose a soft, non-stretch woven cotton for the outside and lining. An old shirt or pillowcase works. Smooth, lightweight felt is easier to stitch through than thick craft felt, especially where the spine crosses the cover.
- Fabric: two cotton rectangles, one felt rectangle and one small cotton patch. The cut sizes are in Step 1.
- Thread: two strands of embroidery floss for the decorative dashes; ordinary all-purpose sewing thread for joining the cover and attaching the felt.
- Tools: a sharp hand-sewing needle with an eye that fits your thread, fabric scissors, a ruler, a removable fabric marker or chalk, and two clips or pins. A thimble is useful. A blunt chopstick or point turner helps ease out corners.
If you’d like a refresher on separating floss, threading the needle or making a running stitch, the LIFVYT beginner’s guide to slow stitching shows those basics. Here we’ll put that familiar stitch on the front and use a sturdier stitch for the seams.
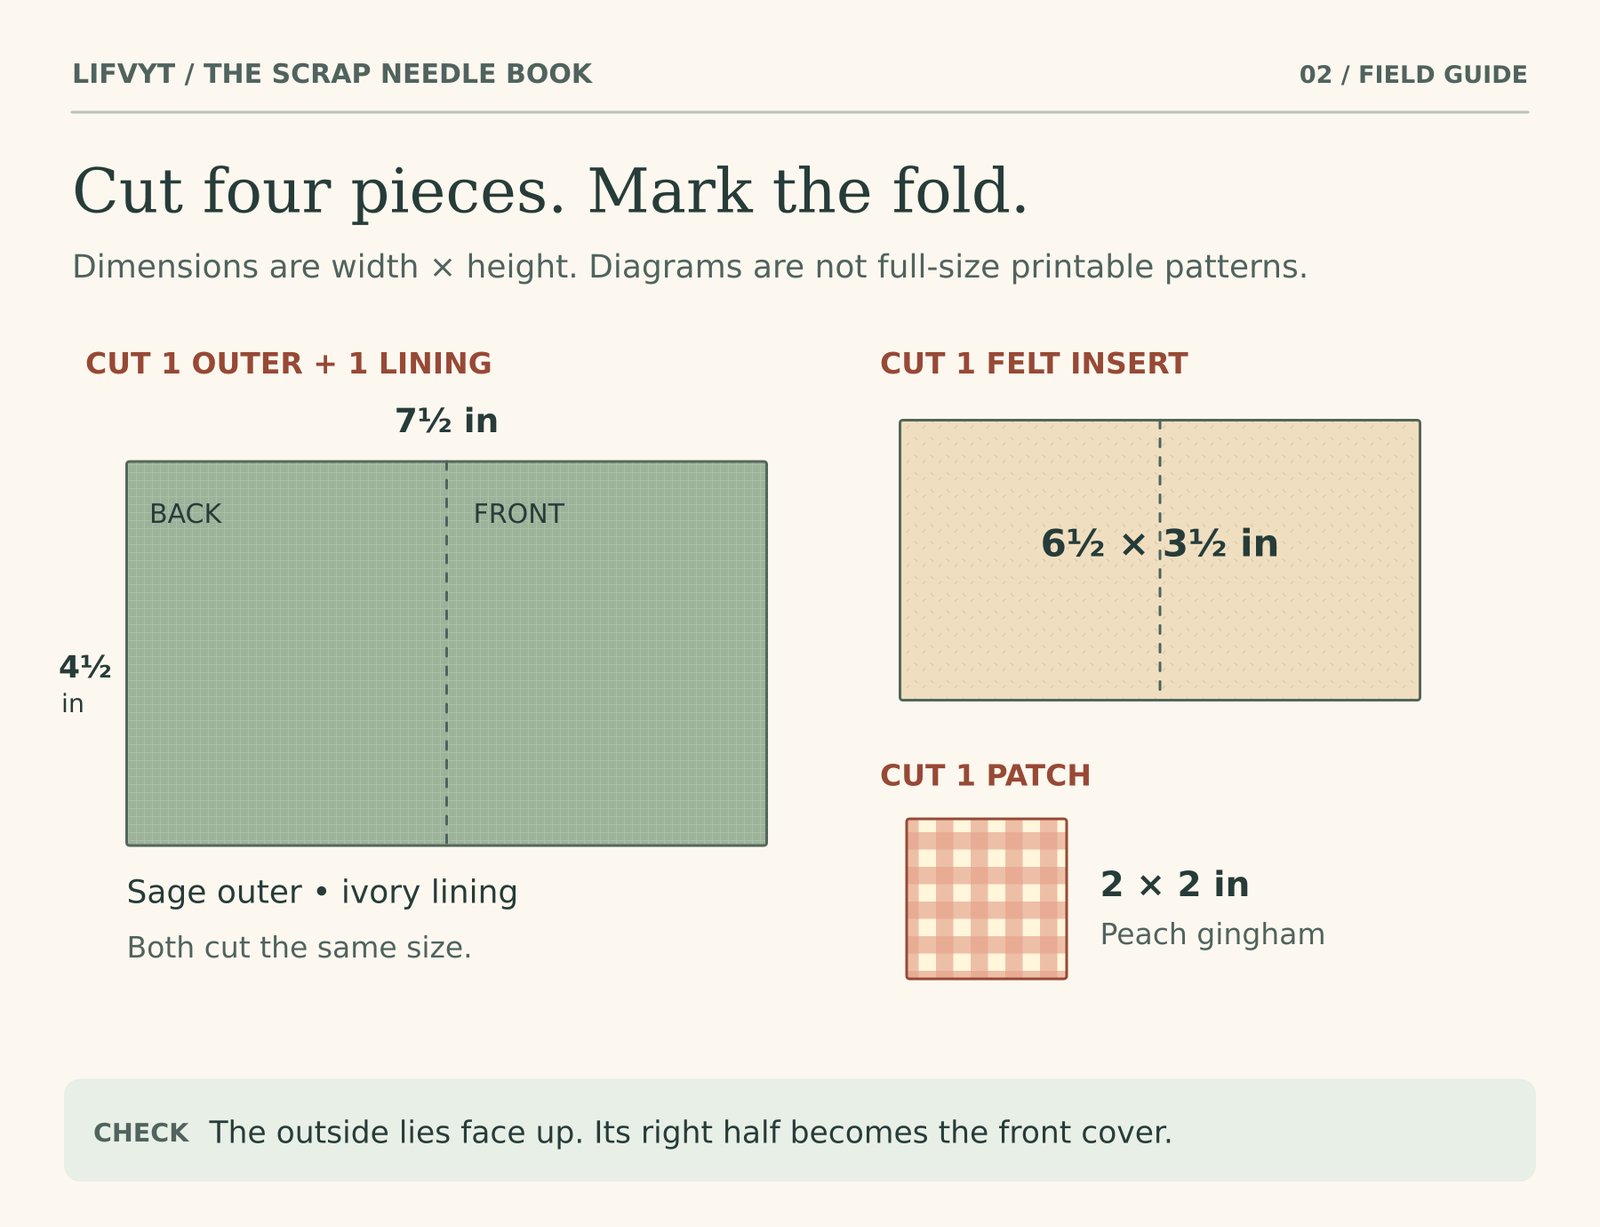
1. Cut four pieces and find the front
- Outer cover: one sage cotton rectangle, 7½ × 4½ inches.
- Lining: one ivory cotton rectangle, 7½ × 4½ inches.
- Pages: one cream felt rectangle, 6½ × 3½ inches.
- Patch: one peach gingham square, 2 × 2 inches.
All sizes are width × height. They already include the cover’s ¼-inch seam allowance—the strip of cloth between the stitching and the cut edge. Lay the outer cotton with its long edges horizontal and its attractive side facing you. Fold it in half like a book, finger-press the fold and open it again.
2. Decorate the front before adding the lining
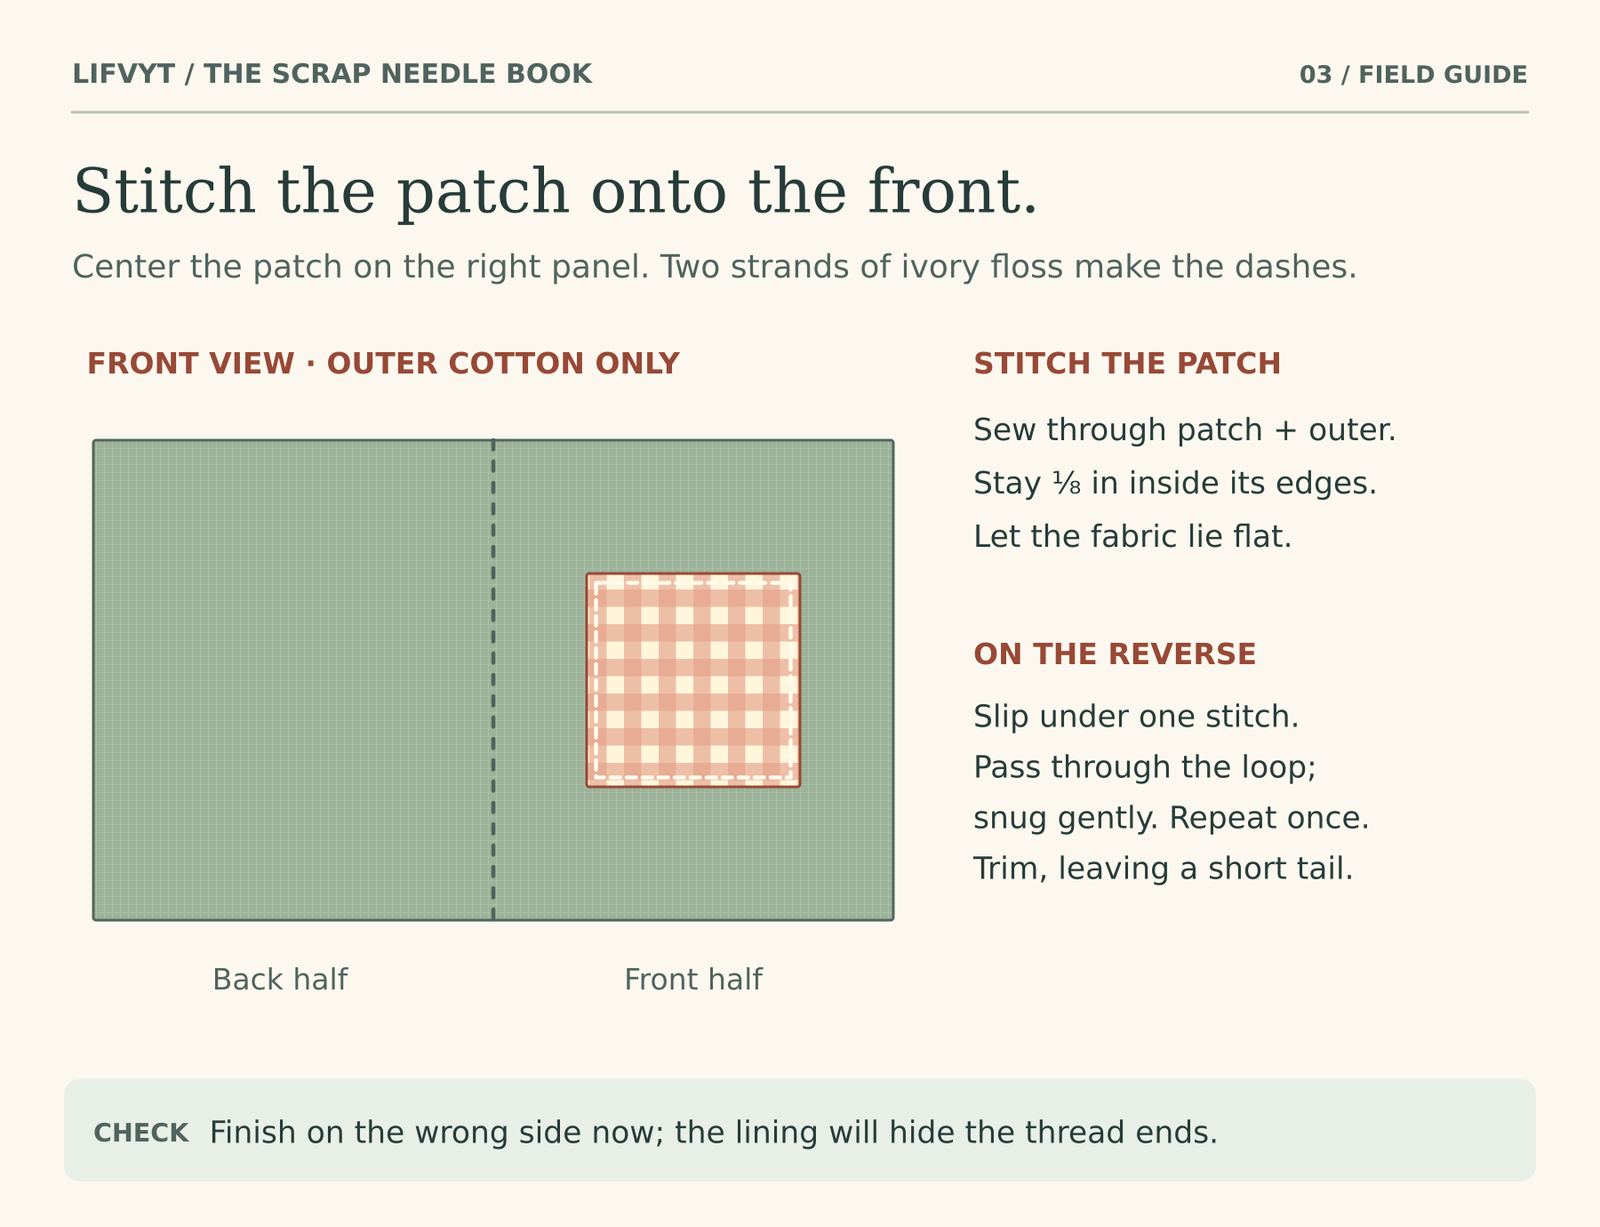
Center the patch on the right-hand panel, with its attractive side up. Clip or pin it. Cut about 18 inches of floss, separate two strands, and thread them together through the needle. Leave a short tail at the eye and knot the long end.
Come up from the back through the outer cotton and patch. Sew around the square with small running stitches about ⅛ inch in from the patch edges. Let the raw edge show; a little fringe is part of the design. Keep the layers flat rather than tugging each dash tight.
End on the back. Pass the needle under a nearby stitch, leaving a small loop. Pass through the loop and snug it; repeat once and trim to a short tail. Remove the pin. This is a good place to stop for the evening.
3. Sew the cover, leaving a way to turn it
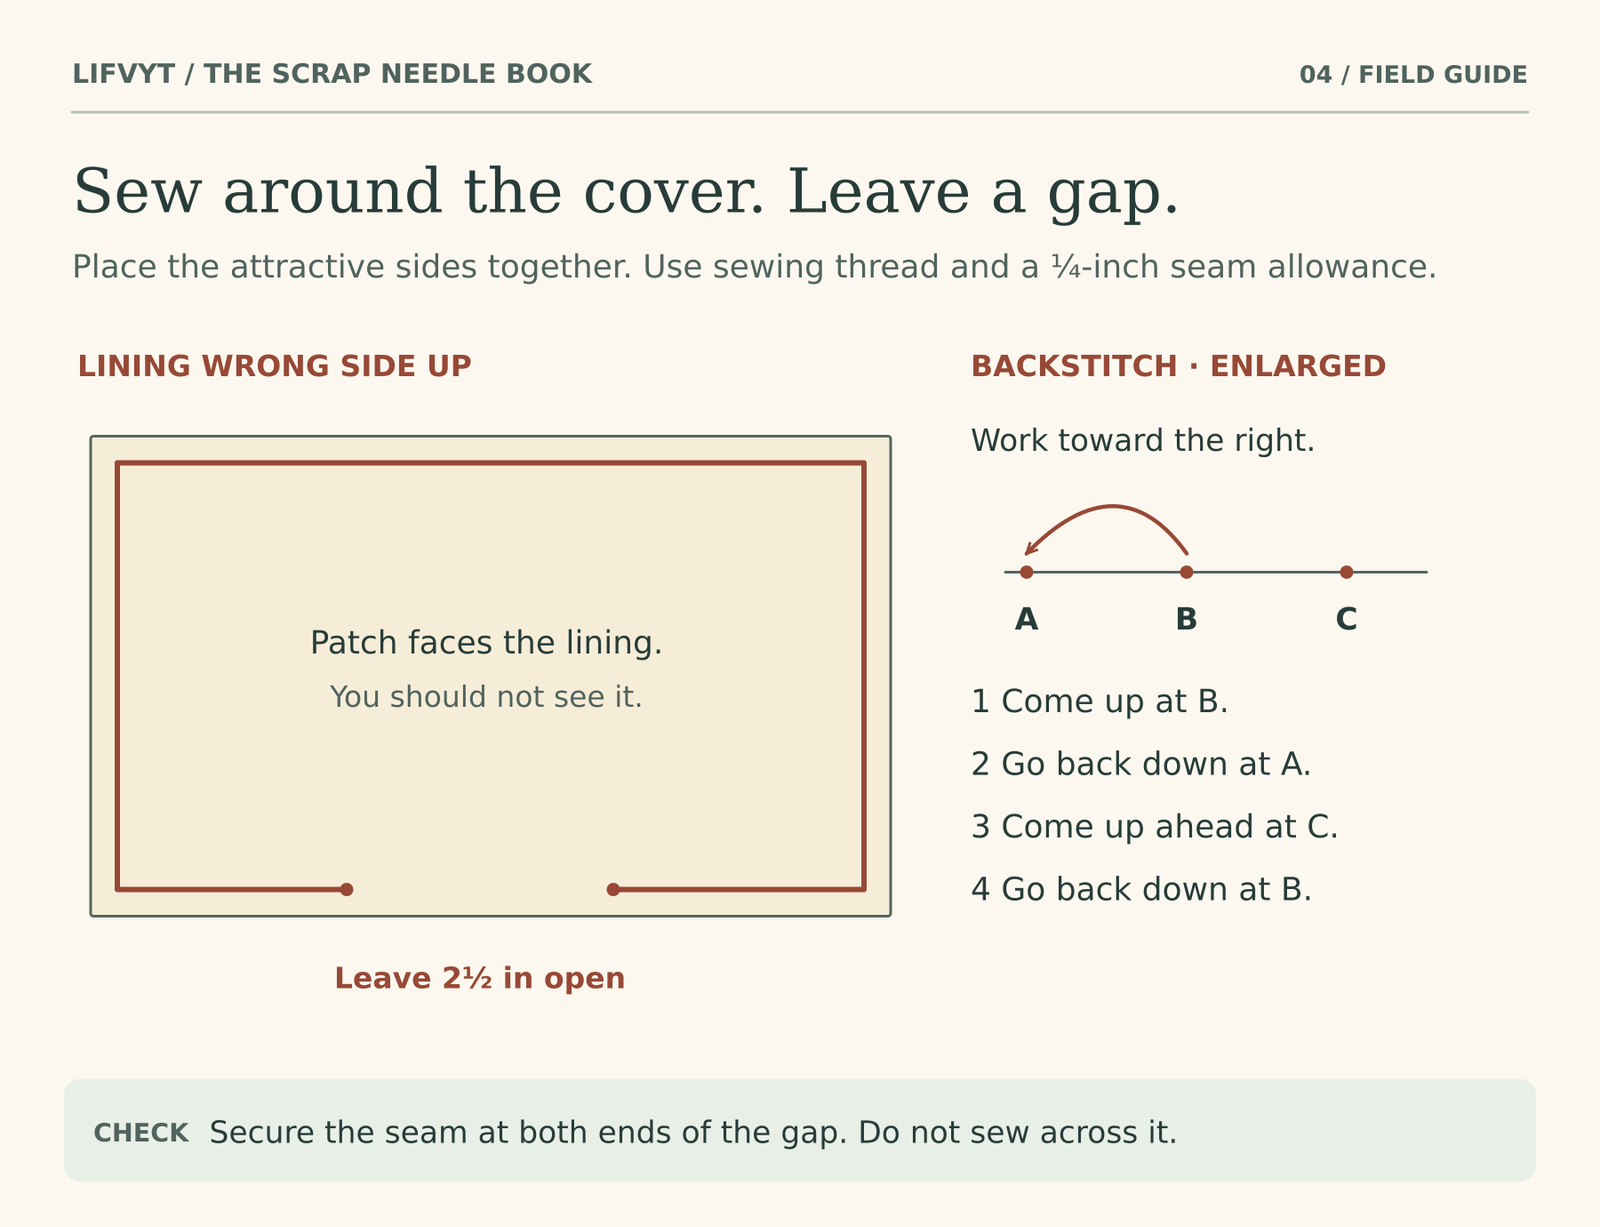
Put the lining on top of the outer cover, attractive sides touching. Align the cut edges and clip. Mark a ¼-inch seam line and two dots 2½ inches apart along the bottom seam. The space between those dots must stay open.
Switch to a single strand of ordinary sewing thread and knot one end. Start at the left dot. Sew toward the left corner, up the side, across the top, down the other side, and along the bottom to the right dot. Use small backstitches, about ⅛ inch long. At a corner, bring the needle up at the turn and continue down the next side.
How a backstitch moves: Imagine three points along the seam, A, B and C. Come up at B, go back down at A, then come up ahead at C. Go back down at B. Repeat that “ahead, then back” movement to make a continuous seam. Secure the ends with a couple of tiny stitches worked over each other; tie off at the second dot.
4. Turn the cover and close the gap
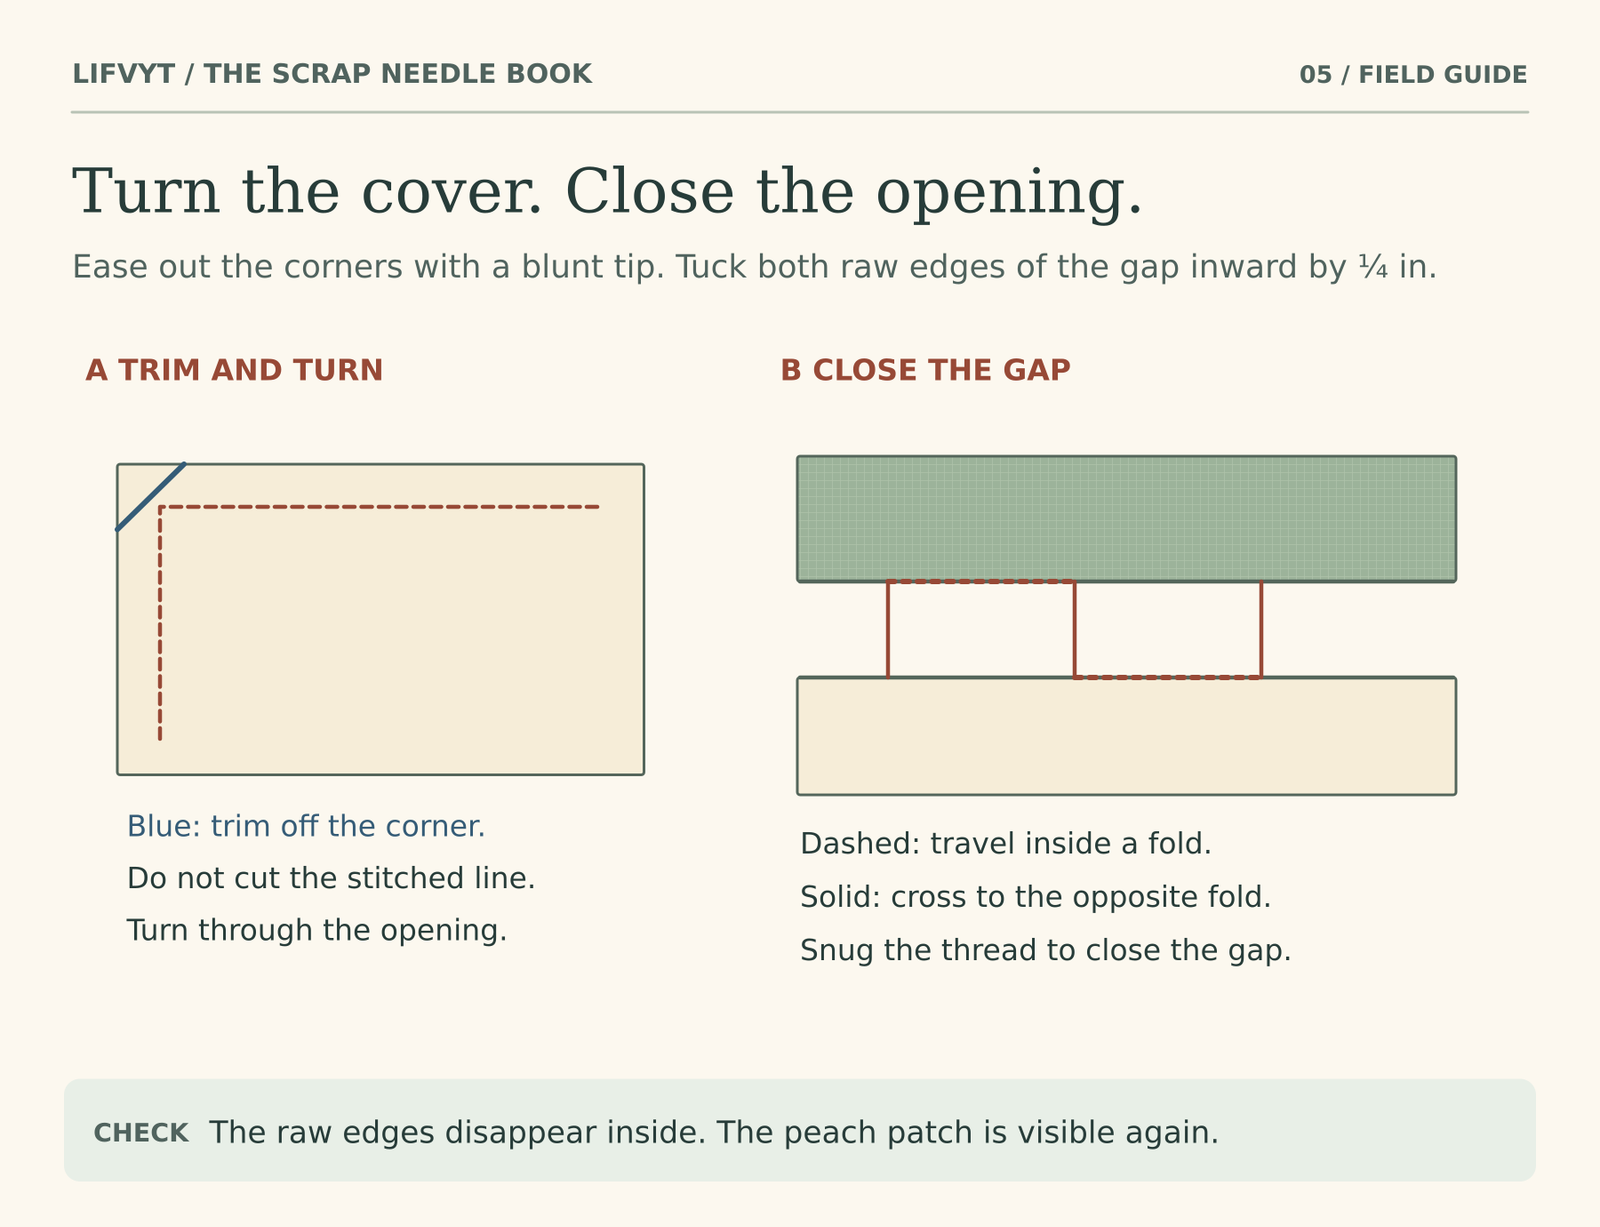
Snip diagonally across the excess fabric at each corner, leaving the seam threads intact. Feed one corner at a time through the bottom opening. Ease out the corners with a blunt tip, then smooth the cover flat. The gingham patch should be on the outside again.
Fold both raw edges of the opening inward by ¼ inch so they follow the sewn bottom edge. To make a ladder stitch, hide the knot inside one folded edge. Cross straight over to the opposite fold, take a small bite along that crease, then cross back and take a matching bite along the first crease. A “bite” is just the short distance the needle travels inside the fabric.
After a few crossings, pull gently until the edges meet. Continue to the end and secure a small loop knot. Slip the needle between the layers, bring it out a short distance away and trim the tail there. The tail settles inside the cover.
5. Center the felt and stitch only the spine
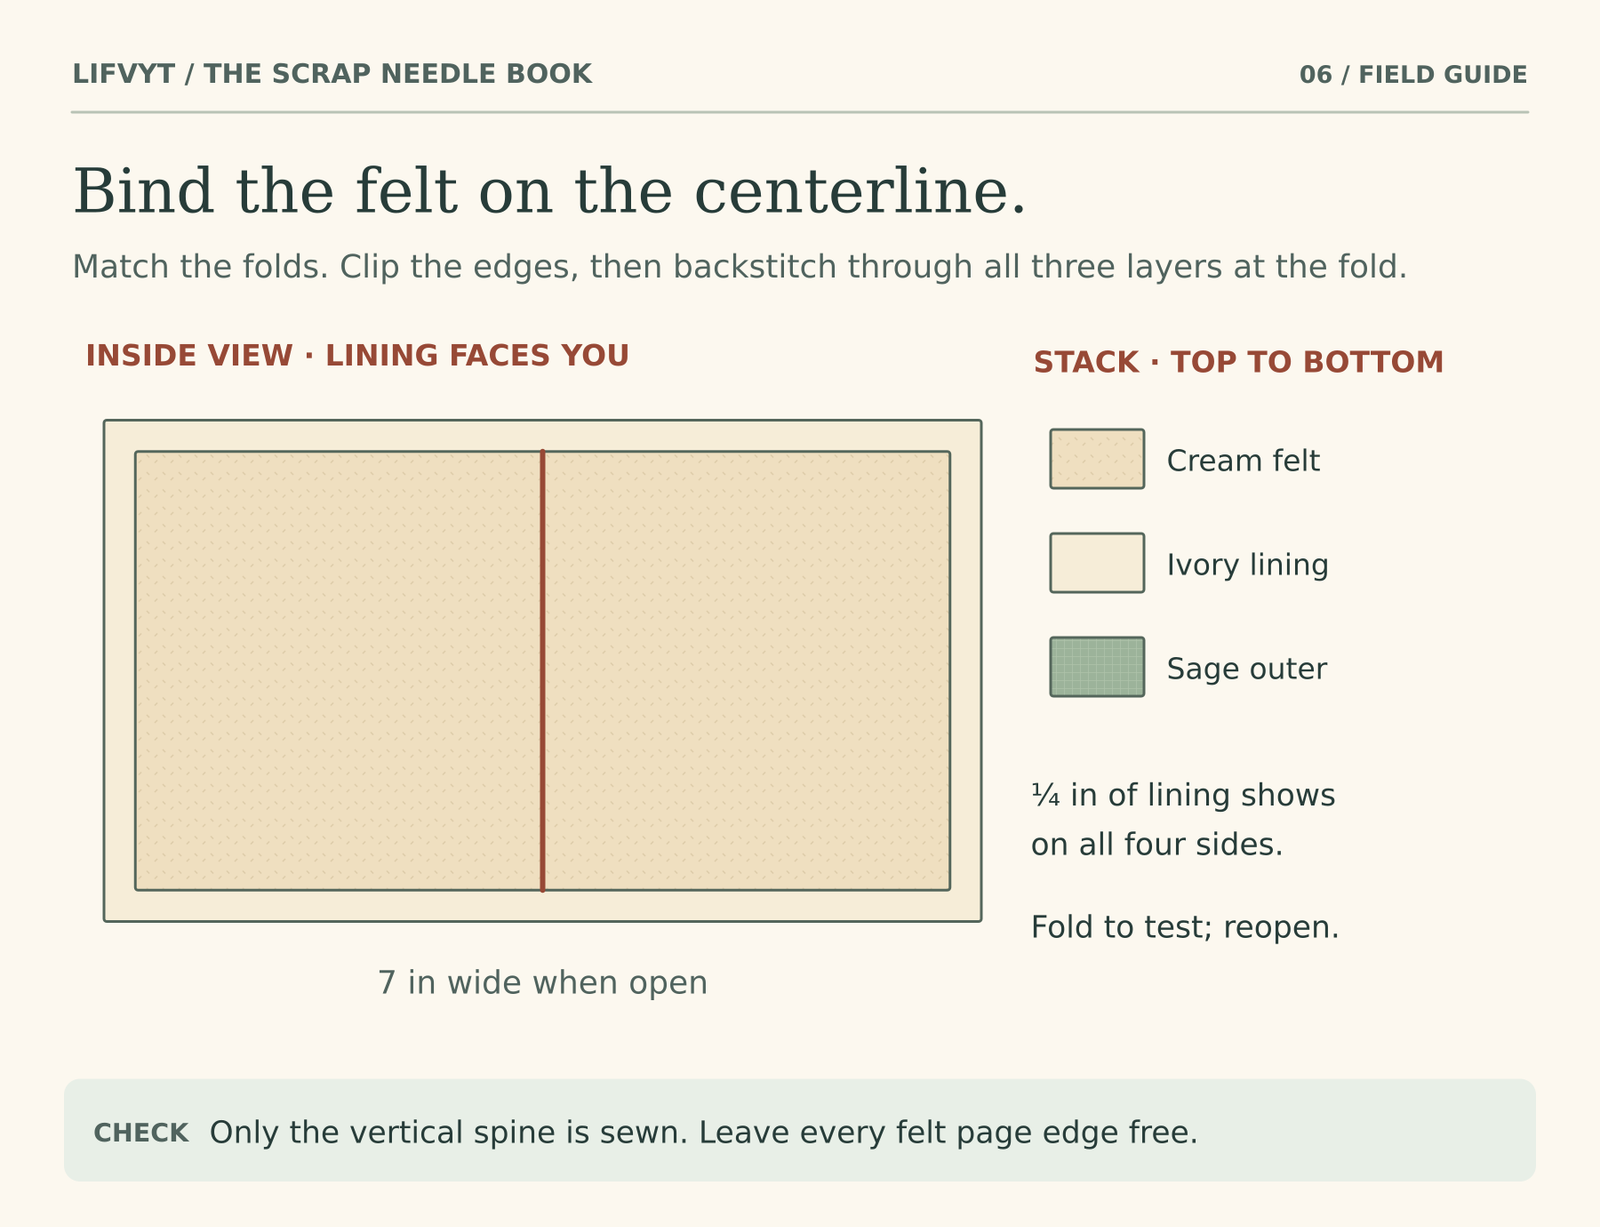
Lay the cover open with the ivory lining facing up. Fold the felt in half across its width, crease it lightly and open it again. Match its center fold to the cover fold. With the pieces flat, you should see about ¼ inch of lining all around the felt.
Clip the sides and test-fold the book. If the felt sticks out, first check that the two creases line up. Open the book flat again. With fresh sewing thread, hide the starting knot between felt and lining. Bring the needle up near the top of the felt crease, a small stitch length in from its edge.
Backstitch down the vertical crease through felt, lining and outer cotton, stopping just inside the bottom edge of the felt. The stitching will show on the outside spine; choose matching thread if you want it subtle. Keep the stack flat as you sew. If it starts to gather, ease the last stitches before continuing.
6. Hide the spine thread and check that the leaves turn
Finish with the needle on the felt side. Slip it under the last spine stitch, pass through the loop and snug it. Repeat once. Send the needle between the felt and lining, bring it back out through the felt about ½ inch away, and trim close to that exit point without cutting the felt.
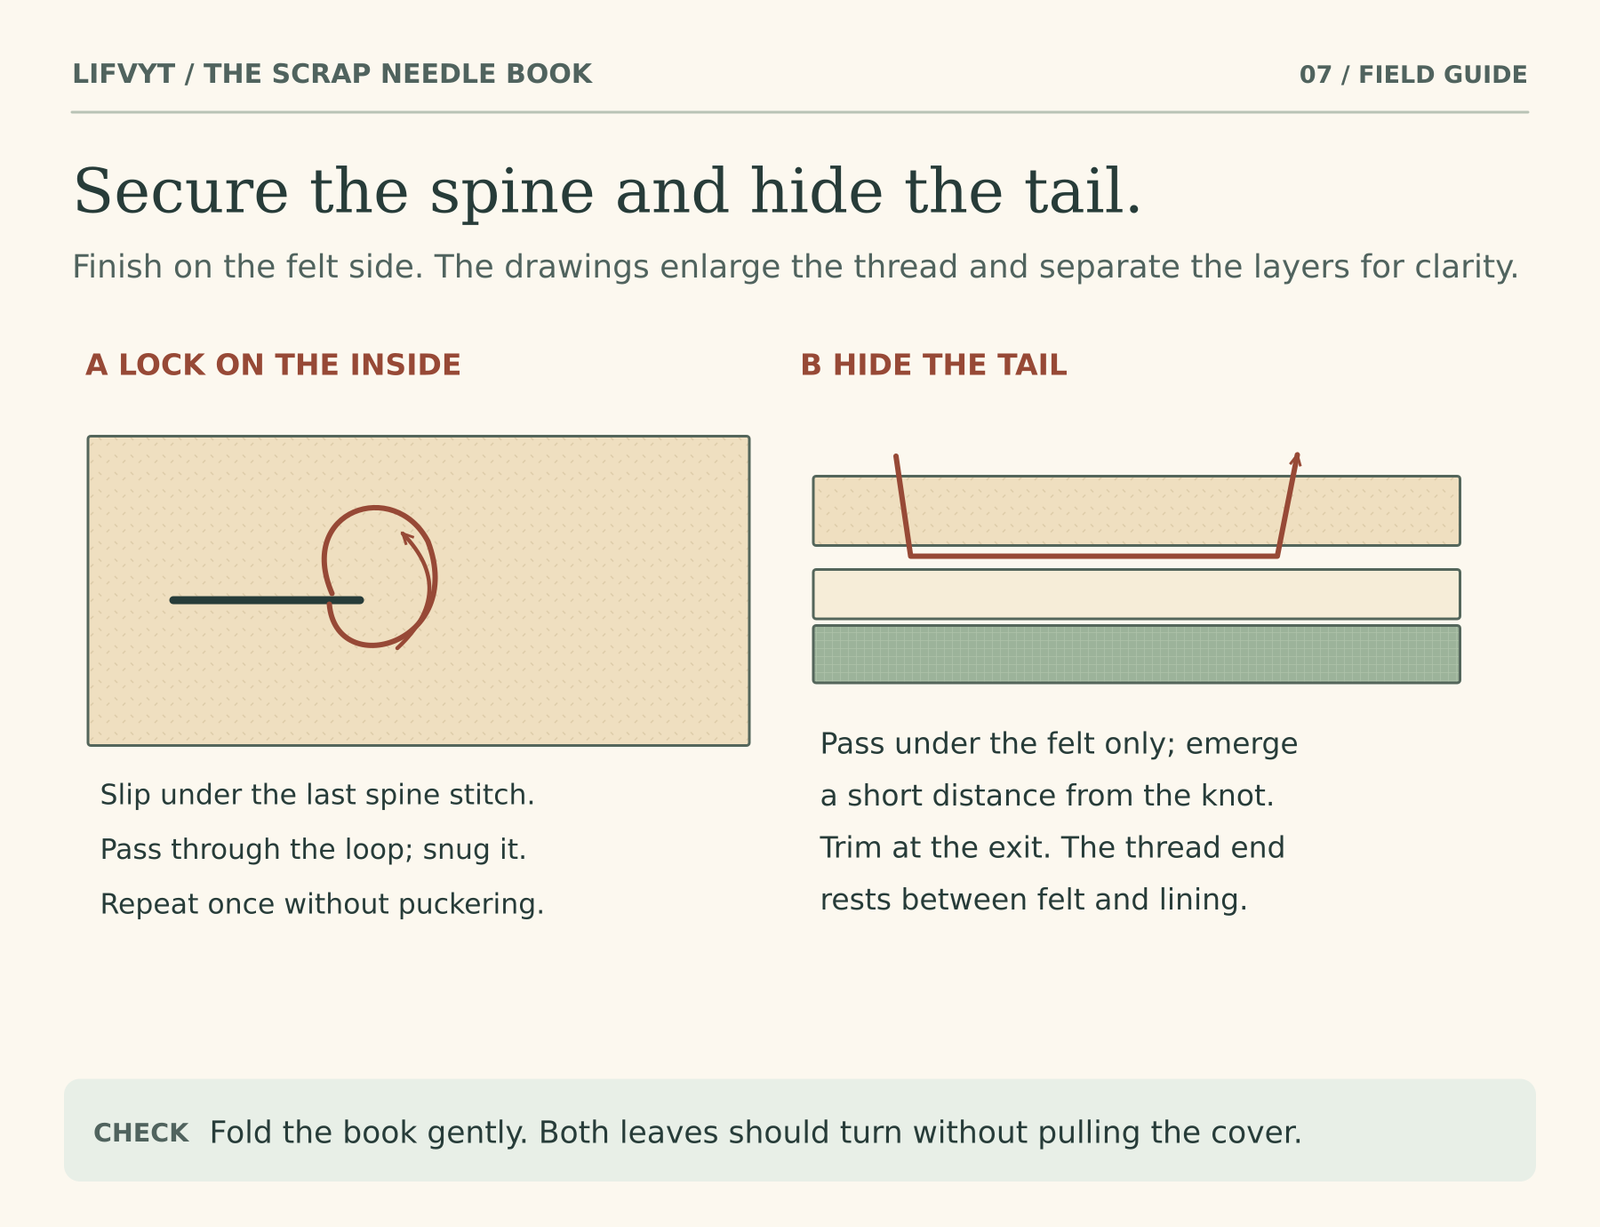
Remove every clip and pin. Fold the book and open it again. One folded rectangle gives you two leaves with four usable faces. Each leaf should lift on its own.
7. Park one needle and check the point
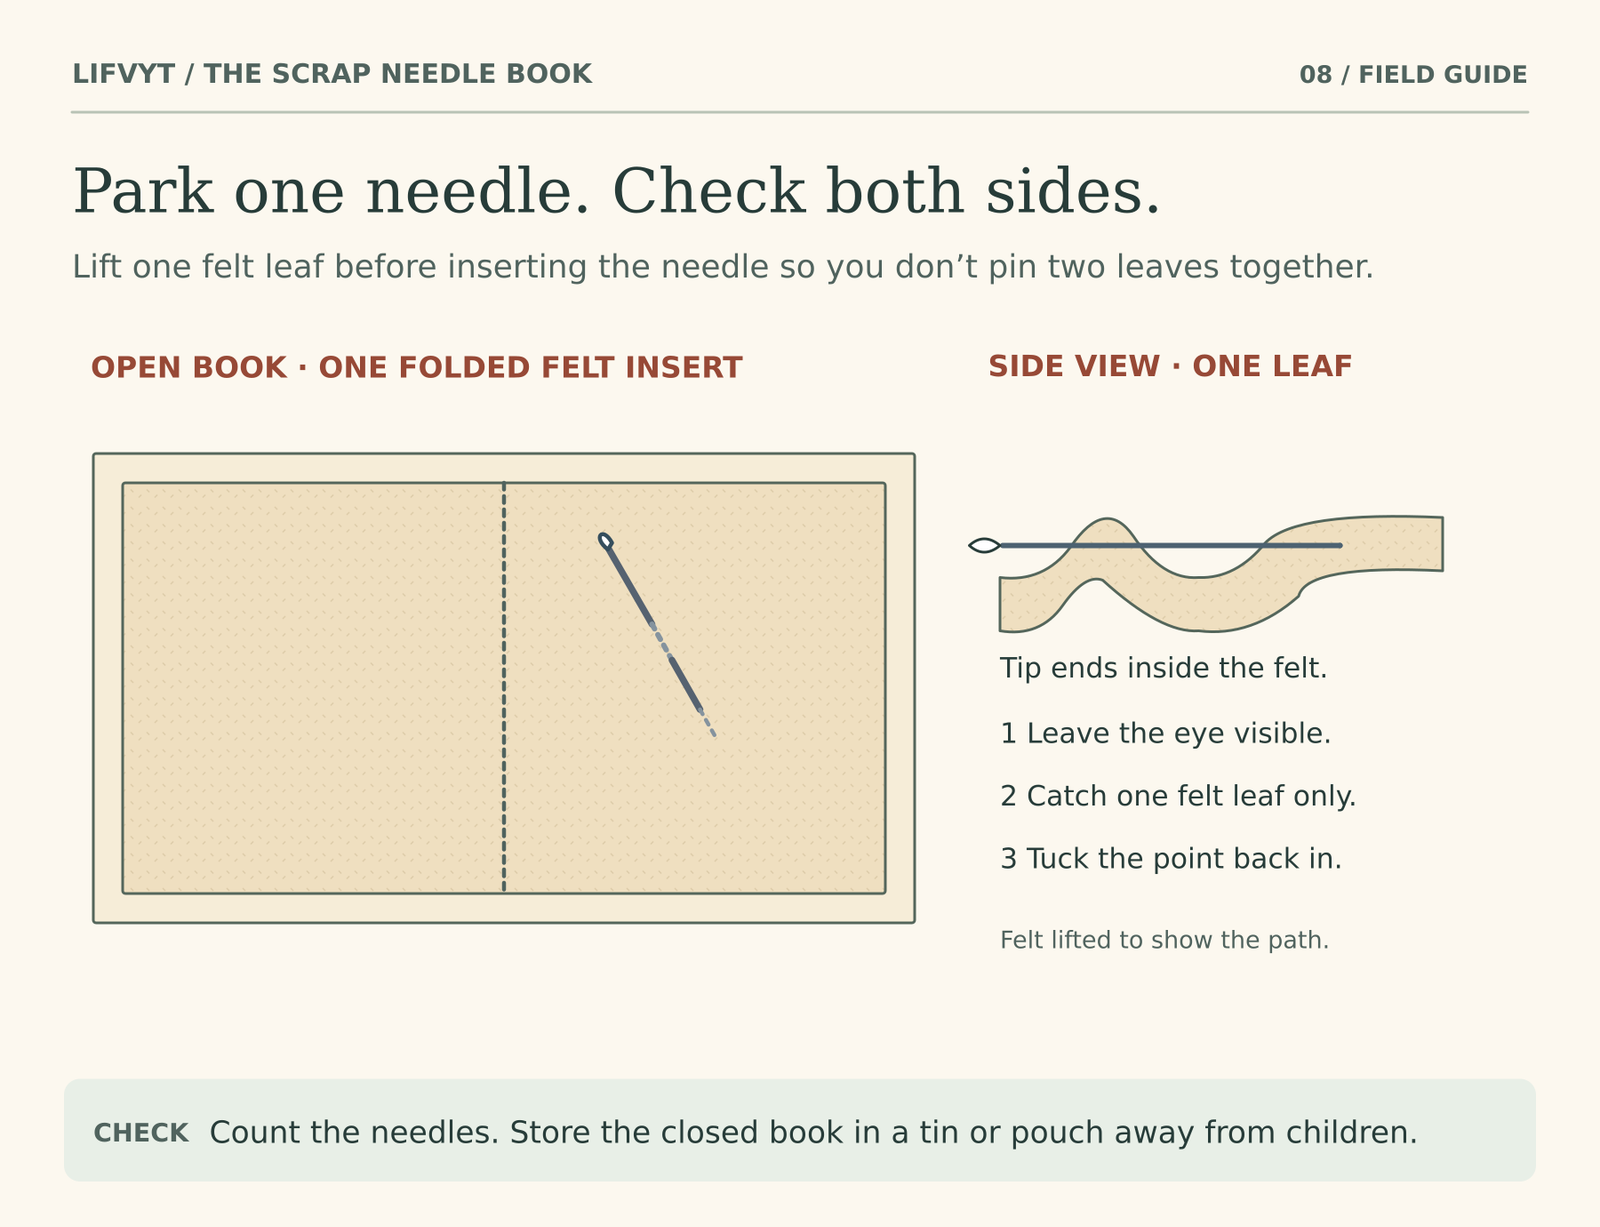
Lift one felt leaf clear of the other. Guide the needle through a small bite of felt so the eye stays visible and part of the shaft shows. Then tuck the point back into that same leaf. Check the underside and the outer edges: the tip should neither poke through nor hang over an edge.
If something looks off
- The patch is on the back. If the cover isn’t assembled yet, reposition the patch. If it’s already sewn, a decorated back is perfectly usable. The book opens just the same.
- The cover won’t turn. Look for the two gap marks. If you stitched between them, carefully remove just those stitches, then resecure the seam ends before turning. Don’t pull hard on the opening.
- A corner looks lumpy. Before you close the gap, turn that corner inside out again and check the extra fabric. Trim bulk without cutting into the seam; don’t poke at it with scissor tips.
- The felt hangs out or the book won’t close flat. Check centering first. If the spine is gathered, loosen and redo the tight section. Trim felt only after checking the fold with the book closed and all needles removed.
If what you enjoyed most was arranging that little patch, try the visible-mending tote project next. For today, one finished book and one needle you can find again is plenty.
Technique references
Avlea Folk Embroidery’s needle-book tutorial shows a lined cover turned through an opening and felt sewn at the spine. The Royal School of Needlework’s backstitch guide illustrates the backward stitch and forward advance. The dimensions and diagrams here are for this LIFVYT project.
Your needle-book checklist
- Cut the outer, lining, felt and patch; mark the center fold.
- Stitch the patch onto the right half of the outer cover.
- Backstitch the cover and lining together; leave the bottom gap open.
- Clip corners, turn right side out and ladder-stitch the gap shut.
- Center the felt and bind only the spine.
- Secure the thread, hide the tail and test both leaves.
- Park the needle, check its tip and count your tools.
Safety note: keep needles, pins and scissors away from children and pets. Store the finished book in a tin or closed pouch; soft felt alone cannot contain every sharp point.
The Sunday Soft Reset
A calmer start to your week.
Get Lifvyt’s weekly collection of gentle wellness reads, nervous-system resets and practical tools — plus the free 5-Minute Nervous System Reset Guide.
By signing up, you’ll receive the free guide and one gentle Lifvyt email each week. Unsubscribe anytime.